个人博客-给文章添加上标签
优化计划
- 置顶3个且可滚动或切换
- 推荐改为4个,然后新增历史文章,将推荐的加载更多放入历史文章,按文章发布时间降序排列。
- 标签功能,可以为文章贴上标签
- 推荐点赞功能
本篇文章实现文章标签功能
思路
首先需要新增一个标签类Tag,然后Post文章类和Tag标签类的关系是多对多的关系。也就是一个文章可以有多个标签,一个标签也可以被多个文章使用。
为了实现这个多对多关系,光有Tag表和Post表还不够,还需要一个中间表去维护标签和文章之间的关联关系,就定为PostTag表吧。
代码实现
准备工作
为Post类新增导航属性
public List<Tag> Tags { get; set; }
新增Tag类
public class Tag
{
    /// <summary>
    /// 标签ID
    /// </summary>
    [Key] //主键
    public int Id { get; set; }

    /// <summary>
    /// 标签名称
    /// </summary>
    public string Name { get; set; }

    /// <summary>
    /// 导航属性 - 文章列表
    /// </summary>
    public List<Post>? Posts { get; set; }
}
新增PostTag类
public class PostTag
{
    /// <summary>
    /// 标签ID
    /// </summary>
    public int TagId { get; set; }

    /// <summary>
    /// 导航属性 - 文章
    /// </summary>
    public Post Post { get; set; }

    /// <summary>
    /// 导航属性 - 标签
    /// </summary>
    public Tag Tag { get; set; }
}
在DbContext数据库上下文中添加新增类
public DbSet<Tag> Tags { get; set; }
public DbSet<PostTag> PostTags { get; set; }
然后是上下文的protected override void OnModelCreating(ModelBuilder modelBuilder)方法中添加
modelBuilder.Entity<Post>()
    .HasMany(e => e.Tags)
    .WithMany(e => e.Posts)
    .UsingEntity<PostTag>();
类创建完成后,需要在数据库中新增Tags表和PostTags表,使用Code First模式或者手动创建都行。
控制器
修改之前打包上传文章的控制器,新增List
public async Task<ApiResponse<Post>> Upload([FromForm] String Categoryname,[FromForm]String Parent, [FromForm] List<string> tags,IFormFile file,[FromServices] ICategoryService categoryService )
服务
在之前的打包上传服务新增标签处理
public async Task<Post> Upload(int CategoryId, List<string> tags,IFormFile file){
    ....之前的代码
         foreach (var tagName in tags)
            {
                var tag = await _myDbContext.Tags.FirstOrDefaultAsync(t => t.Name == tagName);
                if (tag == null)
                {
                    tag = new Tag { Name = tagName };
                    _myDbContext.Tags.Add(tag);
                }

                var postTag = new PostTag
                {
                    Post = post,
                    Tag = tag
                };

                _myDbContext.PostTags.Add(postTag);
            }
                await _myDbContext.SaveChangesAsync();
            return post;
}
接口测试
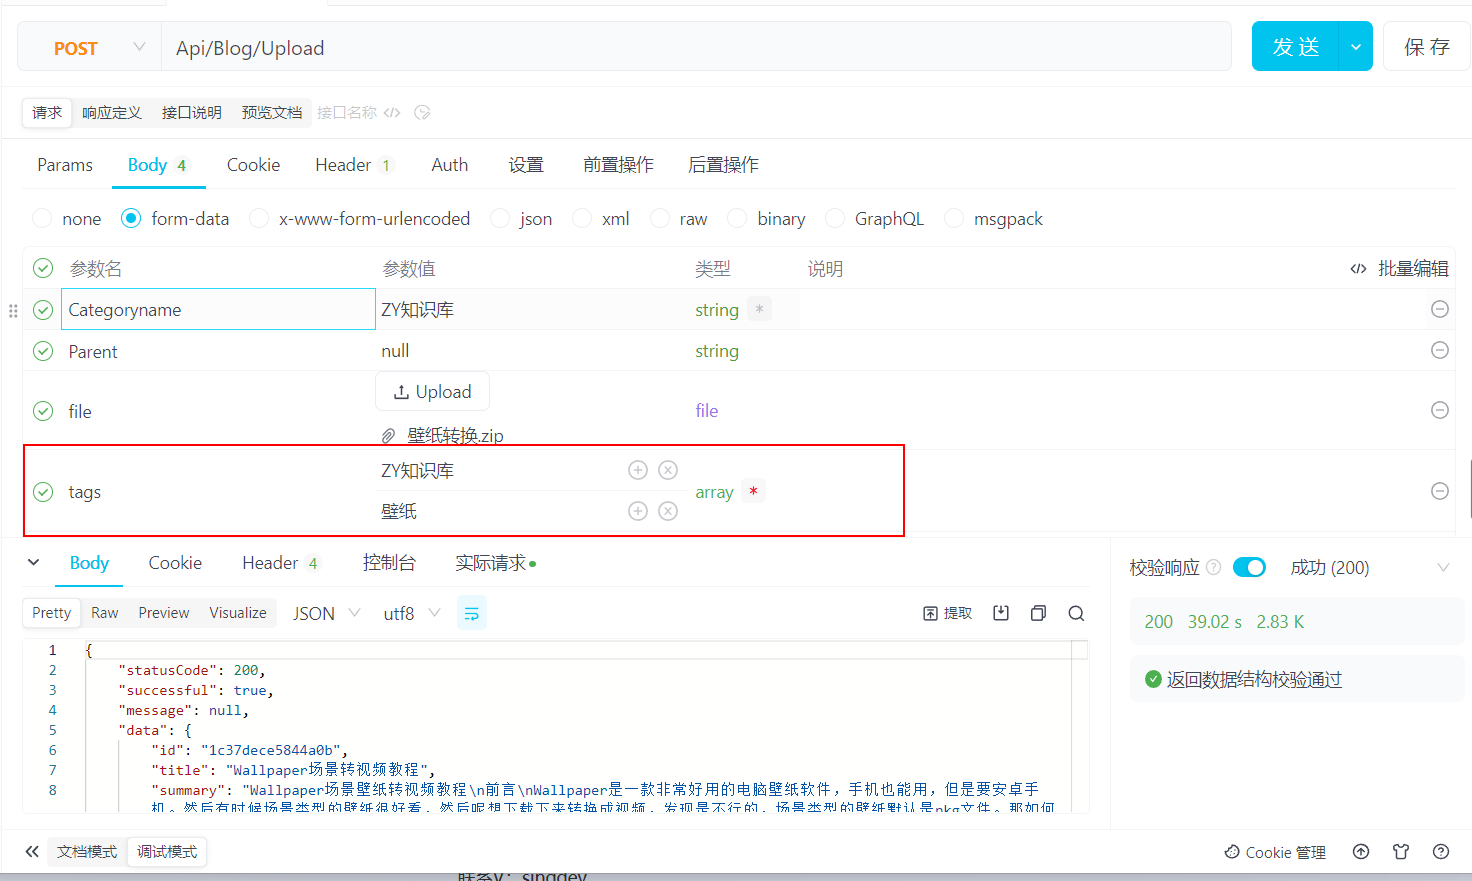
可以看到tags是一个数组类型的参数
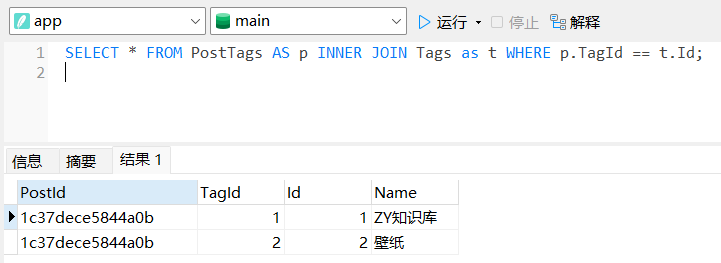
数据库也是添加成功了
Razor页面
上述只是简单的在上传文章的时候设置了一下标签,接下来设计一下页面显示
分页查询服务
首先是分页查询服务,可以看到是返回的一个元组,然后PaginationMetadata是分页数据,之前在做推荐博客加载的时候提过一下,之前是没有用到的,然后现在是用到了,所以需要计算一下分页的信息。顺便提一下这个类是大佬的一个Nuget包,然后是提供了ApiResponsePaged类去把元组和数据类结合在一起,在博客的评论中就用到了ApiResponsePaged类来返回数据给前端。但考虑的标签页的设计,就没用这个类,而是直接使用元组,我发现元组用着也不错。
    public async Task<(List<PostTag>, PaginationMetadata)> GetAllTagPostAsync(QueryParameters param)
    {
        var postTags = await _myDbContext.PostTags
            .Where(p => p.TagId == param.TagId)
            .Include(p => p.Post)
            .ThenInclude(p => p.Categories)
            .Include(p => p.Post)
            .ThenInclude(p => p.Comments)
            .Include(p => p.Post)
            .ThenInclude(p => p.Tags)
            .Skip((param.Page - 1) * param.PageSize)
            .Take(param.PageSize)
            .ToListAsync();

        var totalCount = await _myDbContext.PostTags.CountAsync(p => p.TagId == param.TagId);
        var pageCount = (int)Math.Ceiling((double)totalCount / param.PageSize);

        var pagination = new PaginationMetadata()
        {
            PageNumber = param.Page,
            PageSize = param.PageSize,
            TotalItemCount = totalCount,
            PageCount = pageCount,
            HasPreviousPage = param.Page > 1,
            HasNextPage = param.Page < pageCount,
            IsFirstPage = param.Page == 1,
            IsLastPage = param.Page == pageCount,
            FirstItemOnPage = (param.Page - 1) * param.PageSize + 1,
            LastItemOnPage = Math.Min(param.Page * param.PageSize, totalCount)
        };

        return (postTags, pagination);
    }
控制器
 public async Task<IActionResult> Index(int tagId = 1, int page = 1, int pageSize = 8)
    {
        var TagList = await _tagService.GetAllTagAsync();
        if (TagList.Count == 0)
            return View(new TagIndex()
            {
                TagList = await _tagService.GetAllTagAsync(),
                TagId = 0,
                TagAllPosts = await _tagService.GetAllTagPostAsync(
                    new QueryParameters
                    {
                        Page = page,
                        PageSize = pageSize,
                        TagId = tagId,
                    })
            });

        var currentTag = tagId == 1 ? TagList[0] :await _tagService.GetById(tagId);
        if (currentTag == null)
        {
            _messages.Error($"标签 {currentTag} 不存在!");
            return RedirectToAction(nameof(Index));
        }

        TagIndex tagIndex = new TagIndex()
        {
            TagList = await _tagService.GetAllTagAsync(),
            TagId = currentTag.Id,
            TagAllPosts = await _tagService.GetAllTagPostAsync(
                new QueryParameters
                {
                    Page = page,
                    PageSize = pageSize,
                    TagId = currentTag.Id,
                })
        };
        return View(tagIndex);
    }
分页组件
@model (Personalblog.Model.ViewModels.Categories.PaginationMetadata,int)
<nav aria-label="Page navigation">
<ul class="pagination justify-content-center">
<li class="page-item @(!Model.Item1.HasPreviousPage ? "disabled" : "")">
<a class="page-link" href="#" aria-label="Previous" href="@Url.Action("Index", new { tagId = Model.Item2, page = Model.Item1.PageNumber - 1, pageSize = Model.Item1.PageSize })">
<span aria-hidden="true">«</span>
<span class="sr-only">Previous</span>
</a>
</li>
@for (int i = 1; i <= Model.Item1.PageCount; i++)
{
<li class="page-item @(Model.Item1.PageNumber == i ? "active" : "")">
<a class="page-link" href="@Url.Action("Index", new { tagId = Model.Item2, page = i, pageSize = Model.Item1.PageSize })">@i</a>
</li>
}
<li class="page-item @(!Model.Item1.HasNextPage ? "disabled" : "")">
<a class="page-link" href="#" aria-label="Next" href="@Url.Action("Index", new { tagId = Model.Item2, page = Model.Item1.PageNumber + 1, pageSize = Model.Item1.PageSize })">
<span aria-hidden="true">»</span>
<span class="sr-only">Next</span>
</a>
</li>
</ul>
</nav>
Tag文章组件
@using Personalblog.Migrate
@model List<Personalblog.Model.Entitys.PostTag>

@foreach (var p in Model)
{
    <div class="col-md-3 col-12 mb-2">
        <div class="card" style="padding:0;">
            <img class="bd-placeholder-img card-img-top" alt=""
                 src="@Url.Action("GetRandomImage", "PicLib", new { seed = p.PostId, Width = 800, Height = 1000 })">
            <div class="card-body">
                <h5 class="card-title">@p.Post.Title</h5>
                <p class="card-text">@p.Post.Summary.Limit(50)</p>
                <div class="mb-1 text-muted d-flex align-items-center">
                    <span class="me-2">@p.Post.LastUpdateTime.ToShortDateString()</span>
                    <div class="d-flex align-items-center">
                        <i class="bi bi-eye bi-sm me-1"></i>
                        <span style="font-size: 0.875rem;">@p.Post.ViewCount</span>
                    </div>
                    <span style="width: 10px;"></span> <!-- 这里设置了一个 10px 的间距 -->
                    <div class="d-flex align-items-center">
                        <i class="bi bi-chat-square-dots bi-sm me-1"></i>
                        <span style="font-size: 0.875rem;">@p.Post.Comments.Count</span>
                    </div>
                </div>
            </div>
            <ul class="list-group list-group-flush">
                <li class="list-group-item">
                    <div class="row">
                        @await Html.PartialAsync("Widgets/Tags", p.Post.Tags)
                    </div>
                </li>
            </ul>
            <div class="card-body">
                <a
                   asp-controller="Blog" asp-action="Post" asp-route-id="@p.Post.Id">
                    Continue reading
                </a>
            </div>
        </div>
    </div>
}
Tag主页面
@model Personalblog.Model.ViewModels.Tag.TagIndex
@{
    ViewData["Title"] = "标签页";
}
@section head
{
    <link href="~/lib/Tag/Tag.css" rel="stylesheet">
}
<div class="container px-4 py-3">
    <h2 class="d-flex w-100 justify-content-between pb-2 mb-3 border-bottom">
        <div>Tag</div>
        <div>文章标签</div>
    </h2>

    <div class="row mb-4">
        @await Html.PartialAsync("Widegets/TagPostCard",Model.TagAllPosts.Item1) //文章
    </div>
    @await Html.PartialAsync("Widegets/TagPagination",(Model.TagAllPosts.Item2,Model.TagId))//分页
</div>
我在调用分部视图的时候,元组的好处就体现出来了,将数据和分页分开去写页面,分页视图我就传递item2也就是PaginationMetadata类,文章页面我就传递item1也就是文章数据。
效果展示


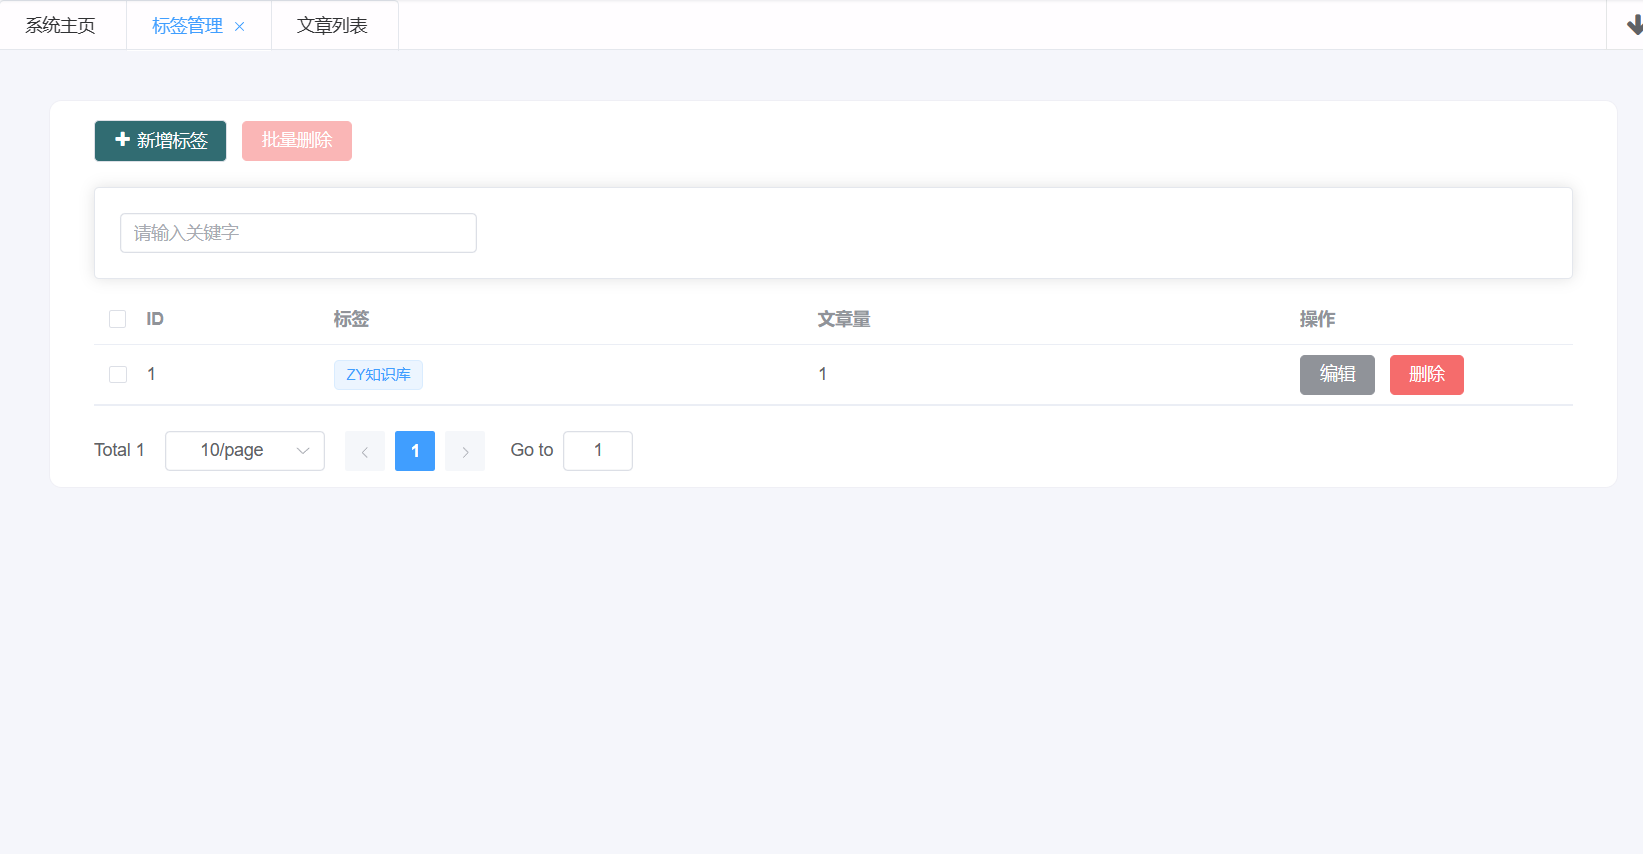
很多文章我还没来得及添加标签,问题不大,文章编辑标签的接口也是写了的~
参考资料
可以去看看官方文档的多对多关系的解释
- 多对多关系 - EF Core | Microsoft Learn https://learn.microsoft.com/zh-cn/ef/core/modeling/relationships/many-to-many
结尾
页面就简单的做完了,然后后台的接口就是一些简单的crud,这里就不细讲了。主要看多对多关系和元组这2个好东西就行了~
