
基于.NET Core + Jquery实现文件断点分片上传
前言
该项目是基于.NET Core 和 Jquery实现的文件分片上传,没有经过测试,因为博主没有那么大的文件去测试,目前上传2G左右的文件是没有问题的。
使用到的技术
- Redis缓存技术
- Jquery ajax请求技术
为什么要用到Redis,文章后面再说,先留个悬念。
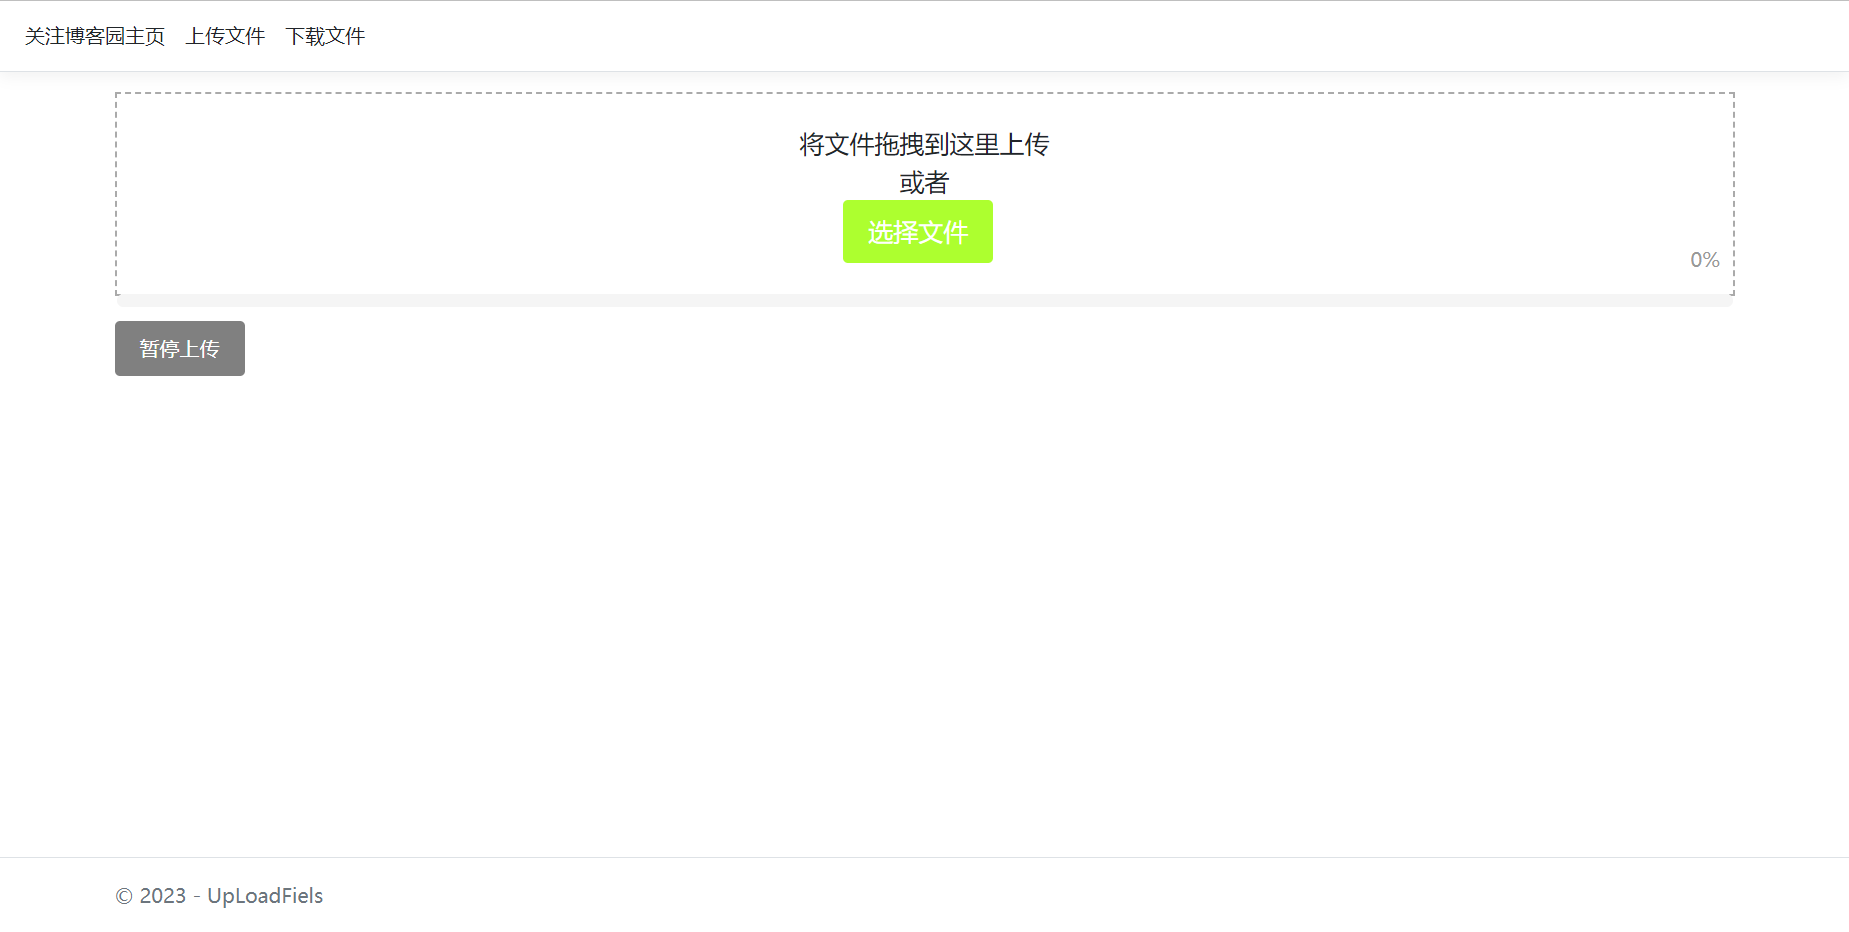
页面截图
NuGet包
Microsoft.Extensions.Caching.StackExchangeRedis
Zack.ASPNETCore 杨中科封装的操作Redis包
分片上传是如何进行的?
在实现代码的时候,我们需要了解文件为什么要分片上传,我直接上传不行吗。大家在使用b站、快手等网站的视频上传的时候,可以发现文件中断的话,之前已经上传了的文件再次上传会很快。这就是分片上传的好处,如果发发生中断,我只要上传中断之后没有上传完成的文件即可,当一个大文件上传的时候,用户可能会断网,或者因为总总原因导致上传失败,但是几个G的文件,难不成又重新上传吗,那当然不行。
具体来说,分片上传文件的原理如下:
- 客户端将大文件切割成若干个小文件块,并为每个文件块生成一个唯一的标识符,以便后续的合并操作。
- 客户端将每个小文件块上传到服务器,并将其标识符和其他必要的信息发送给服务器。
- 服务器接收到每个小文件块后,将其保存在临时文件夹中,并返回一个标识符给客户端,以便客户端后续的合并操作。
- 客户端将所有小文件块的标识符发送给服务器,并请求服务器将这些小文件块合并成一个完整的文件。
- 服务器接收到客户端的请求后,将所有小文件块按照其标识符顺序进行合并,并将合并后的文件保存在指定的位置。
- 客户端接收到服务器的响应后,确认文件上传成功。
总的来说,分片上传文件的原理就是将一个大文件分成若干个小文件块,分别上传到服务器,最后再将这些小文件块合并成一个完整的文件。
在了解原理之后开始实现代码。
后端实现
注册reidis服务
首先在Program.cs配置文件中注册reidis服务
builder.Services.AddScoped<IDistributedCacheHelper, DistributedCacheHelper>();
//注册redis服务
builder.Services.AddStackExchangeRedisCache(options =>
{
    string connStr = builder.Configuration.GetSection("Redis").Value;
    string password = builder.Configuration.GetSection("RedisPassword").Value;
    //redis服务器地址
    options.Configuration = $"{connStr},password={password}";
});
在appsettings.json中配置redis相关信息
  "Redis": "redis地址",
  "RedisPassword": "密码"
保存文件的实现
在控制器中注入
private readonly IWebHostEnvironment _environment;
private readonly IDistributedCacheHelper _distributedCache;
public UpLoadController(IDistributedCacheHelper distributedCache, IWebHostEnvironment environment)
        {
            _distributedCache = distributedCache;
            _environment = environment;
        }
从redis中取文件名
 string GetTmpChunkDir(string fileName)
 {
            var s = _distributedCache.GetOrCreate<string>(fileName, ( e) =>
            {
                //滑动过期时间
                //e.SlidingExpiration = TimeSpan.FromSeconds(1800);
                //return Encoding.Default.GetBytes(Guid.NewGuid().ToString("N"));
                return fileName.Split('.')[0];
            }, 1800);
            if (s != null) return fileName.Split('.')[0]; ;
            return "";
}
实现保存文件方法
/// <summary>
/// 保存文件
/// </summary>
/// <param name="file">文件</param>
/// <param name="fileName">文件名</param>
/// <param name="chunkIndex">文件块</param>
/// <param name="chunkCount">分块数</param>
/// <returns></returns>
public async Task<JsonResult> SaveFile(IFormFile file, string fileName, int chunkIndex, int chunkCount)
{
try
{
//说明为空
if (file.Length == 0)
{
return Json(new
{
success = false,
mas = "文件为空!!!"
});
}
if (chunkIndex == 0)
{
////第一次上传时,生成一个随机id,做为保存块的临时文件夹
//将文件名保存到redis中,时间是s
_distributedCache.GetOrCreate(fileName, (e) =>
{
//滑动过期时间
//e.SlidingExpiration = TimeSpan.FromSeconds(1800);
//return Encoding.Default.GetBytes(Guid.NewGuid().ToString("N"));
return fileName.Split('.')[0]; ;
}, 1800);
}
if(!Directory.Exists(GetFilePath())) Directory.CreateDirectory(GetFilePath());
var fullChunkDir = GetFilePath() + dirSeparator + GetTmpChunkDir(fileName);
if(!Directory.Exists(fullChunkDir)) Directory.CreateDirectory(fullChunkDir);
var blog = file.FileName;
var newFileName = blog + chunkIndex + Path.GetExtension(fileName);
var filePath = fullChunkDir + Path.DirectorySeparatorChar + newFileName;
//如果文件块不存在则保存,否则可以直接跳过
if (!System.IO.File.Exists(filePath))
{
//保存文件块
using (var stream = new FileStream(filePath, FileMode.Create))
{
await file.CopyToAsync(stream);
}
}
//所有块上传完成
if (chunkIndex == chunkCount - 1)
{
//也可以在这合并,在这合并就不用ajax调用CombineChunkFile合并
//CombineChunkFile(fileName);
}
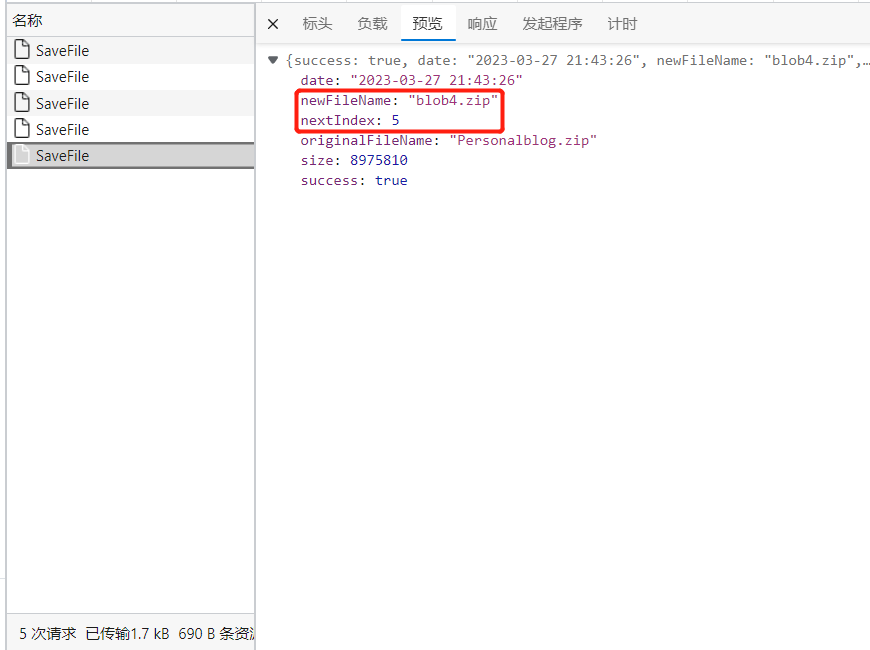
var obj = new
{
success = true,
date = DateTime.Now.ToString("yyyy-MM-dd HH:mm:ss"),
newFileName,
originalFileName = fileName,
size = file.Length,
nextIndex = chunkIndex + 1,
};
return Json(obj);
}
catch (Exception ex)
{
return Json(new
{
success = false,
msg = ex.Message,
});
}
}
讲解关键代码 Redis部分
当然也可以放到session里面,这里就不做演示了。
这是将文件名存入到redis中,作为唯一的key值,当然这里最好采用
Encoding.Default.GetBytes(Guid.NewGuid().ToString("N"));去随机生成一个id保存,为什么我这里直接用文件名,一开始写这个是为了在学校上机课时和室友之间互相传文件,所以没有考虑那么多,根据自己的需求来。
在第一次上传文件的时候,redis会保存该文件名,如果reids中存在该文件名,那么后面分的文件块就可以直接放到该文件名下。
 _distributedCache.GetOrCreate(fileName, (e) =>
 {
     //滑动过期时间
     //e.SlidingExpiration = TimeSpan.FromSeconds(1800);
     //return Encoding.Default.GetBytes(Guid.NewGuid().ToString("N"));
     return fileName.Split('.')[0]; ;
}, 1800);
合并文件方法
//目录分隔符,兼容不同系统
static readonly char dirSeparator = Path.DirectorySeparatorChar;
//获取文件的存储路径
//用于保存的文件夹
private string GetFilePath()
{
    return Path.Combine(_environment.WebRootPath, "UploadFolder");
}
 public async Task<JsonResult> CombineChunkFile(string fileName)
 {
            try
            {
                return await Task.Run(() =>
                {
                    //获取文件唯一id值,这里是文件名
                    var tmpDir = GetTmpChunkDir(fileName);
                    //找到文件块存放的目录
                    var fullChunkDir = GetFilePath() + dirSeparator + tmpDir;
					//开始时间
                    var beginTime = DateTime.Now;
                    //新的文件名
                    var newFileName = tmpDir + Path.GetExtension(fileName);
                    var destFile = GetFilePath() + dirSeparator + newFileName;
                    //获取临时文件夹内的所有文件块,排好序
                    var files = Directory.GetFiles(fullChunkDir).OrderBy(x => x.Length).ThenBy(x => x).ToList();
                    //将文件块合成一个文件
                    using (var destStream = System.IO.File.OpenWrite(destFile))
                    {
                        files.ForEach(chunk =>
                        {
                            using (var chunkStream = System.IO.File.OpenRead(chunk))
                            {
                                chunkStream.CopyTo(destStream);
                            }

                            System.IO.File.Delete(chunk);

                        });
                        Directory.Delete(fullChunkDir);
                    }
					//结束时间
                    var totalTime = DateTime.Now.Subtract(beginTime).TotalSeconds;
                    return Json(new
                    {
                        success = true,
                        destFile = destFile.Replace('\\', '/'),
                        msg = $"合并完成 ! {totalTime} s",
                    });
                });
            }catch (Exception ex)
            {
                return Json(new
                {
                    success = false,
                    msg = ex.Message,
                });
            }
            finally
            {
                _distributedCache.Remove(fileName);
            }
}
前端实现
原理
原理就是获取文件,然后切片,通过分片然后递归去请求后端保存文件的接口。
首先引入Jquery
<script src="~/lib/jquery/dist/jquery.min.js"></script>
然后随便写一个上传页面
<div class="dropzone" id="dropzone">
    将文件拖拽到这里上传<br>
    或者<br>
    <input type="file" id="file1">
    <button for="file-input" id="btnfile" value="Upload" class="button">选择文件</button>
    <div id="progress">
        <div id="progress-bar"></div>
    </div>
    <div id="fName" style="font-size:16px"></div>
    <div id="percent">0%</div>
</div>
<button id="btnQuxiao" class="button2" disabled>暂停上传</button>
<div id="completedChunks"></div>
css实现
稍微让页面能够看得下去
<style>
    .dropzone {
        border: 2px dashed #ccc;
        padding: 25px;
        text-align: center;
        font-size: 20px;
        margin-bottom: 20px;
        position: relative;
    }

        .dropzone:hover {
            border-color: #aaa;
        }

    #file1 {
        display: none;
    }

    #progress {
        position: absolute;
        bottom: -10px;
        left: 0;
        width: 100%;
        height: 10px;
        background-color: #f5f5f5;
        border-radius: 5px;
        overflow: hidden;
    }

    #progress-bar {
        height: 100%;
        background-color: #4CAF50;
        width: 0%;
        transition: width 0.3s ease-in-out;
    }

    #percent {
        position: absolute;
        bottom: 15px;
        right: 10px;
        font-size: 16px;
        color: #999;
    }
    .button{
        background-color: greenyellow;
    }
    .button, .button2 {
        color: white;
        padding: 10px 20px;
        border: none;
        border-radius: 4px;
        cursor: pointer;
        margin-right: 10px;
    }

    .button2 {
        background-color: grey;
    }
</style>
Jqueuy代码实现
<script>
$(function(){
var pause = false;//是否暂停
var $btnQuxiao = $("#btnQuxiao"); //暂停上传
var $file; //文件
var $completedChunks = $('#completedChunks');//上传完成块数
var $progress = $('#progress');//上传进度条
var $percent = $('#percent');//上传百分比
var MiB = 1024 * 1024;
var chunkSize = 8.56 * MiB;//xx MiB
var chunkIndex = 0;//上传到的块
var totalSize;//文件总大小
var totalSizeH;//文件总大小M
var chunkCount;//分块数
var fileName;//文件名
var dropzone = $('#dropzone'); //拖拽
var $fileInput = $('#file1'); //file元素
var $btnfile = $('#btnfile'); //选择文件按钮
//通过自己的button按钮去打开选择文件的功能
$btnfile.click(function(){
$fileInput.click();
})
dropzone.on('dragover', function () {
$(this).addClass('hover');
return false;
});
dropzone.on('dragleave', function () {
$(this).removeClass('hover');
return false;
});
dropzone.on('drop', function (e) {
setBtntrue();
e.preventDefault();
$(this).removeClass('hover');
var val = $('#btnfile').val()
if (val == 'Upload') {
$file = e.originalEvent.dataTransfer.files[0];
if ($file === undefined) {
$completedChunks.html('请选择文件 !');
return false;
}
totalSize = $file.size;
chunkCount = Math.ceil(totalSize / chunkSize * 1.0);
totalSizeH = (totalSize / MiB).toFixed(2);
fileName = $file.name;
$("#fName").html(fileName);
$('#btnfile').val("Pause")
pause = false;
chunkIndex = 0;
}
postChunk();
});
$fileInput.change(function () {
setBtntrue();
console.log("开始上传文件!")
var val = $('#btnfile').val()
if (val == 'Upload') {
$file = $fileInput[0].files[0];
if ($file === undefined) {
$completedChunks.html('请选择文件 !');
return false;
}
totalSize = $file.size;
chunkCount = Math.ceil(totalSize / chunkSize * 1.0);
totalSizeH = (totalSize / MiB).toFixed(2);
fileName = $file.name;
$("#fName").html(fileName);
$('#btnfile').val("Pause")
pause = false;
chunkIndex = 0;
}
postChunk();
})
function postChunk() {
console.log(pause)
if (pause)
return false;
var isLastChunk = chunkIndex === chunkCount - 1;
var fromSize = chunkIndex * chunkSize;
var chunk = !isLastChunk ? $file.slice(fromSize, fromSize + chunkSize) : $file.slice(fromSize, totalSize);
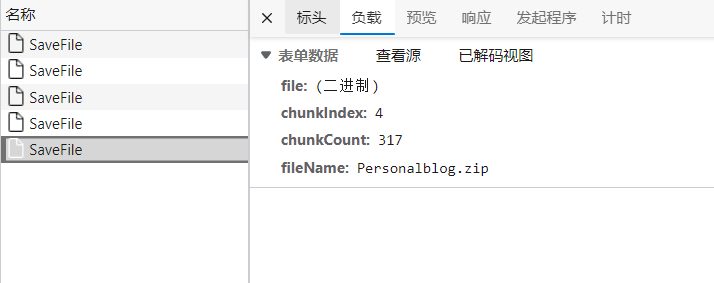
var fd = new FormData();
fd.append('file', chunk);
fd.append('chunkIndex', chunkIndex);
fd.append('chunkCount', chunkCount);
fd.append('fileName', fileName);
$.ajax({
url: '/UpLoad/SaveFile',
type: 'POST',
data: fd,
cache: false,
contentType: false,
processData: false,
success: function (d) {
if (!d.success) {
$completedChunks.html(d.msg);
return false;
}
chunkIndex = d.nextIndex;
//递归出口
if (isLastChunk) {
$completedChunks.html('合并 .. ');
$btnfile.val('Upload');
setBtntrue();
//合并文件
$.post('/UpLoad/CombineChunkFile', { fileName: fileName }, function (d) {
$completedChunks.html(d.msg);
$completedChunks.append('destFile: ' + d.destFile);
$btnfile.val('Upload');
setBtnfalse()
$fileInput.val('');//清除文件
$("#fName").html("");
});
}
else {
postChunk();//递归上传文件块
//$completedChunks.html(chunkIndex + '/' + chunkCount );
$completedChunks.html((chunkIndex * chunkSize / MiB).toFixed(2) + 'M/' + totalSizeH + 'M');
}
var completed = chunkIndex / chunkCount * 100;
$percent.html(completed.toFixed(2) + '%').css('margin-left', parseInt(completed / 100 * $progress.width()) + 'px');
$progress.css('background', 'linear-gradient(to right, #ff0084 ' + completed + '%, #e8c5d7 ' + completed + '%)');
},
error: function (ex) {
$completedChunks.html('ex:' + ex.responseText);
}
});
}
$btnQuxiao.click(function(){
var val = $('#btnfile').val();
if (val == 'Pause') {
$btnQuxiao.css('background-color', 'grey');
val = 'Resume';
pause = true;
} else if (val === 'Resume') {
$btnQuxiao.css('background-color', 'greenyellow');
val = 'Pause';
pause = false;
}
else {
$('#btnfile').val("-");
}
console.log(val + "" + pause)
$('#btnfile').val(val)
postChunk();
})
//设置按钮可用
function setBtntrue(){
$btnQuxiao.prop('disabled', false)
$btnQuxiao.css('background-color', 'greenyellow');
}
//设置按钮不可用
function setBtnfalse() {
$btnQuxiao.prop('disabled', true)
$btnQuxiao.css('background-color', 'grey');
}
})
</script>
合并文件请求
var isLastChunk = chunkIndex === chunkCount - 1;
当isLastChunk 为true时,执行合并文件,这里就不会再去请求保存文件了。
总结
分片上传文件原理很简单,根据原理去实现代码,慢慢的摸索很快就会熟练掌握,当然本文章有很多写的不好的地方可以指出来,毕竟博主还只是学生,需要不断的学习。
有问题评论,看到了会回复。